Complete Review Items
Before a review is started, people work behind the scenes to set up the review by pulling detailed permission information into Permission Assist from various different applications. Permission Assist combines that permission with other user and supervisor information so you'll have everything you need to complete your review.
As a reviewer, your mission for each review is to complete review items using an easy 3-step process:
Step 1 - Select an Application
The list of applications included within the review is displayed in the panel on the left (circled on the image below). If your review includes multiple applications, select the application you want to review.
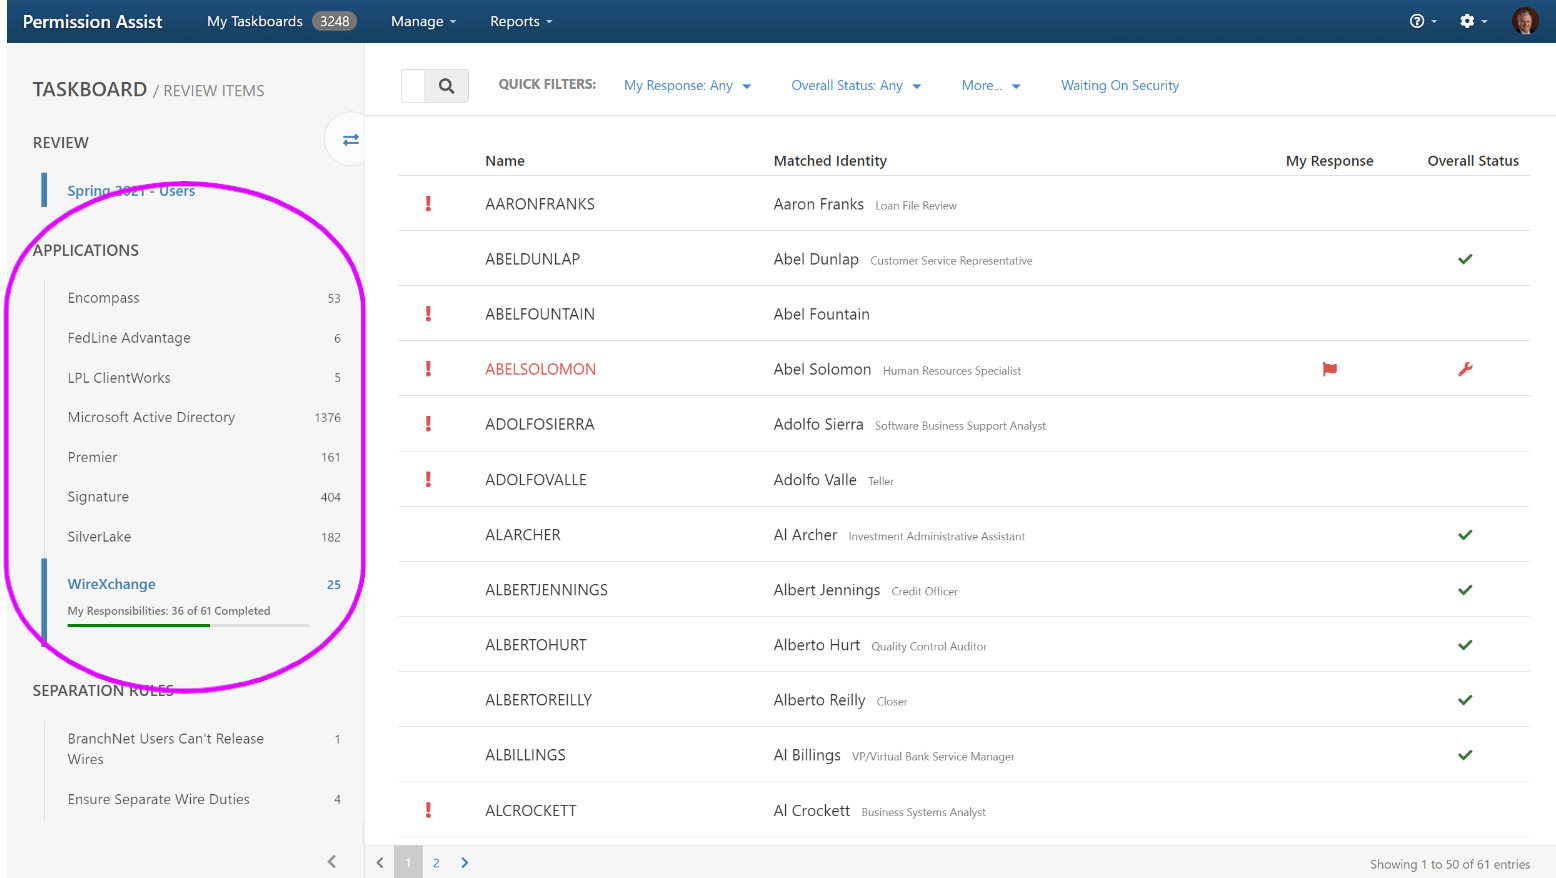
After selecting the application, the list of corresponding items is displayed on the right.
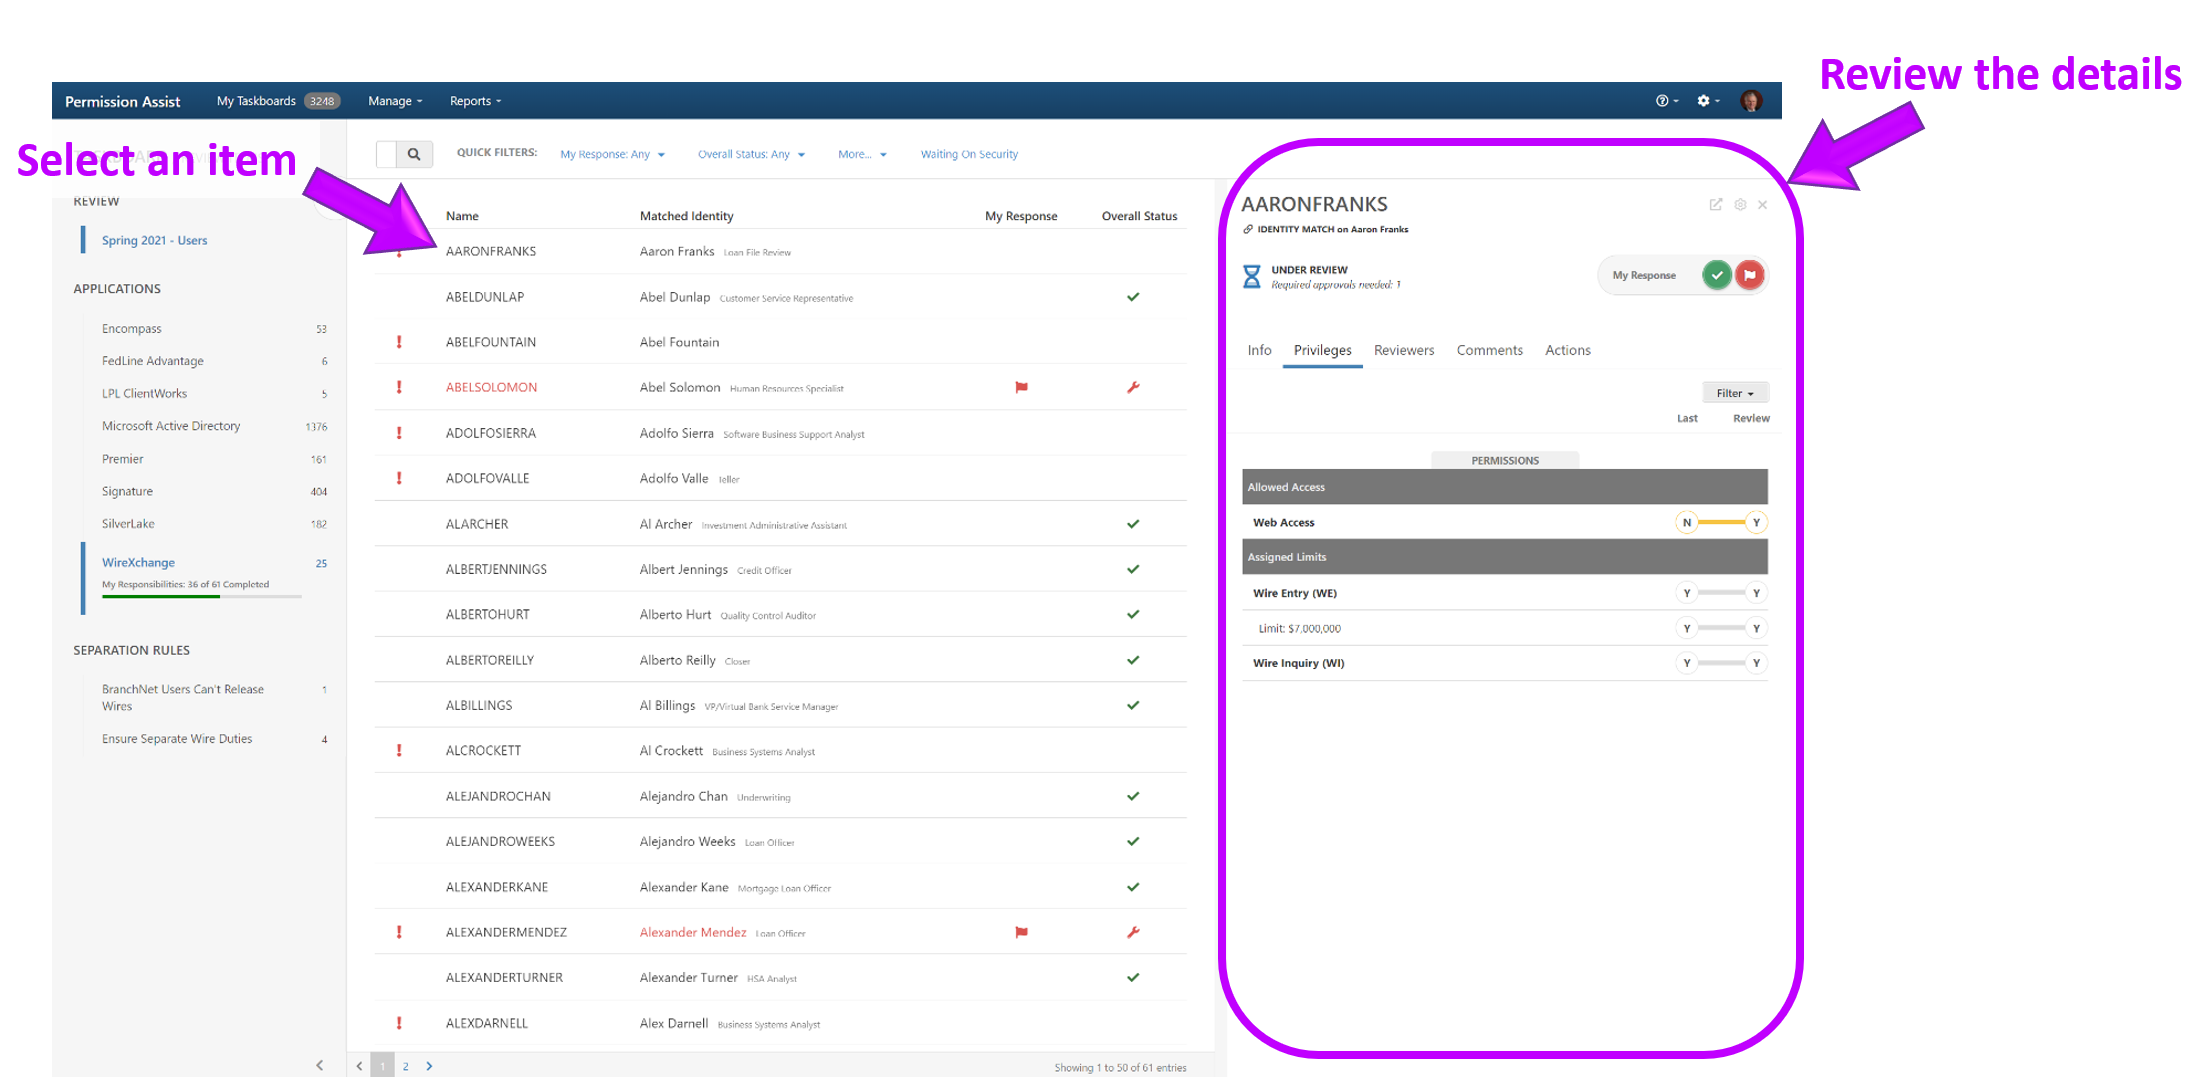
Step 2 – Select a Review Item
Select an item within the list. After selecting the item, the detail pane appears on the right side of the window (circled in the picture below), which allows you to review the information.
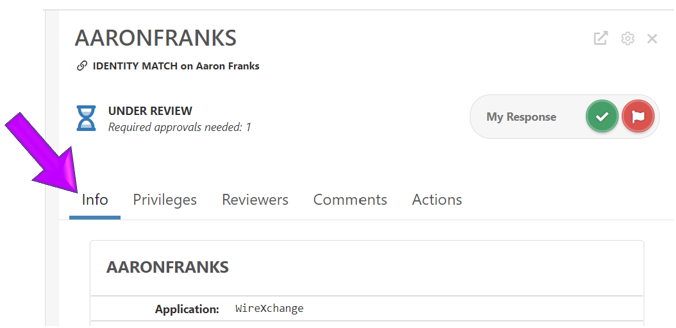
Step 3 – Review the Information and Mark as Approved or Flagged
-
To begin reviewing the details of the item, select the Info tab (see picture below). A more detailed description of the user information and the matched Identity are displayed.
-
Verify that the correct person (Identity) has been assigned to the user ID. If all looks good, continue to the next step to begin reviewing individual permissions.
-
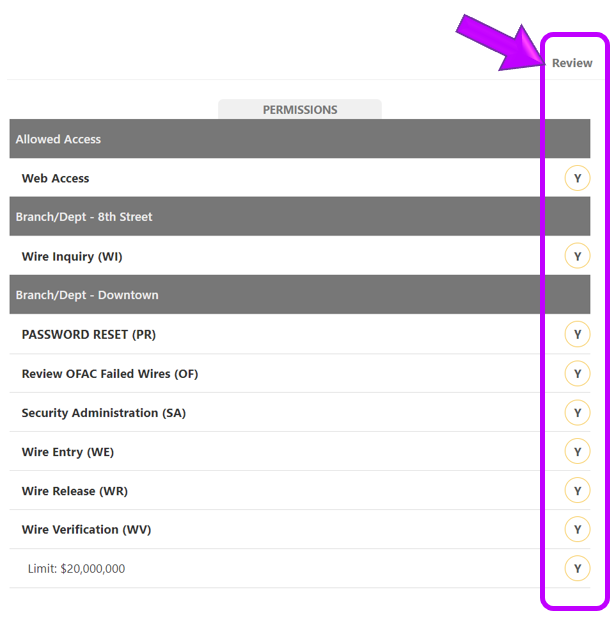
Review individual permissions.
When reviewing permissions for the first time, you’ll see one review column that displays the permissions (circled in the picture below).
NOTES:
-
After reviewing the application for the first time, you’ll see two columns – one showing the results of the previous review and one showing the results of the current review so you can compare quickly.
-
The actual permissions for each application vary; your headings and descriptions may look different than those displayed here.
-
-
Review each line item and determine whether the user has the appropriate permissions.
-
If the permissions are correct and no changes are needed, you can approve the item by selecting the green check mark to the right of the item’s status. If changes are needed, you can send the item to remediation by selecting the red flag.

NOTES:
-
Items that are marked as approved are changed to an "Approved" status and your work for those items is complete.
-
Depending on how your Permission Assist Administrators set up remediation workflow, flagged items will change to either "Flagged" or "In Remediation" status. If the item changes to a "Flagged" status, you'll need to start the remediation process before the item will be sent to the Provision Team. To send the item to the Provision Team, select the Actions button (
 ) in the upper right corner of the detail panel and pick Start Remediation.
 -
Also depending on how remediation workflow is set up, you may be required to verify changes after the Provision Team completes their changes. For additional information about completing the verification process refer to: Verify Access Requests
-
-
Continue to select items from the list and mark them as approved or flagged until all items within the application have been reviewed.
If you'd like additional training for reviewers, please open a support ticket here: https://smatech2.my.site.com/SMASupportPortal